Legoaizer -
Help Legoaizer -
Help |
Legoaizer -
Help
Tutorial for Shaped Pegboards
Legoaizer has the option to create Beads mosaics from
shaped Pegboards. The application has 70 pre-installed pegboard shapes from
Artkal. Each of these shapes has a peg layout, and an outline of the shape. The
nice thing is that it's quite easy to make shapes this way if you have an
accompanying example from Artkal. The downside is... you need a lot of
imagination to design anything else that is not from the Artkal example. We have two
supporting methods to make more use of shapes pegboards: smearing the source image over
the pegboard ('goo-ing'), and starting from scratch,
using a drawing tool.
Lesson 1:
Using shaped pegboards
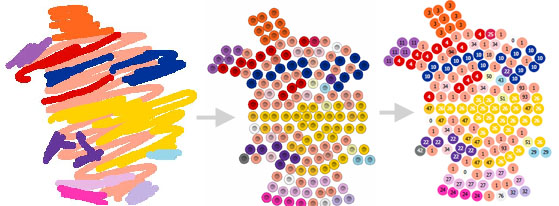
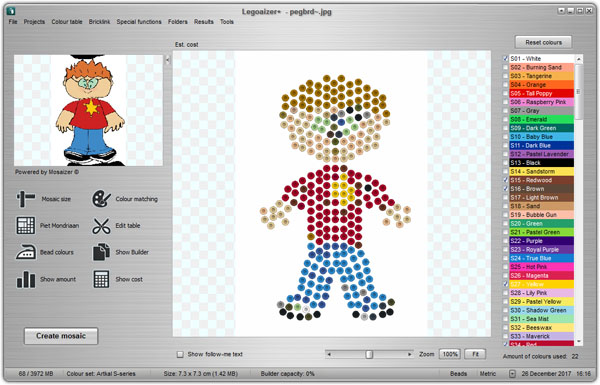
The application has about 70 shaped pegboards installed. These pegboards are dedicated to a certain theme, e.g. a car, a butterfly, a cat. The amount of pegs on such a shaped board is usually small, where the shape itself is already indicating the bead mosaic. These shaped pegboards are perfectly suitable for children, who want to create a cat, but starting from a square pegboard requires a quite a lot of creativity, and e.g. using transparent sources. The shaped pegboards are excellent guides for children where to put the beads, and have a beautiful result in no-time. Here are a few examples of shaped pegboards (courtesy of Artkal).

There is a tricky aspect to these shapes pegboards: how can you create a blueprint that actually fits into the area of these boards? It seems that many images are quite ok, but does not have the shape of the pegboard. The dolphin on the left of the above image seems perfectly fitting the board, but that is just one dolphin. Can we do more with this board?
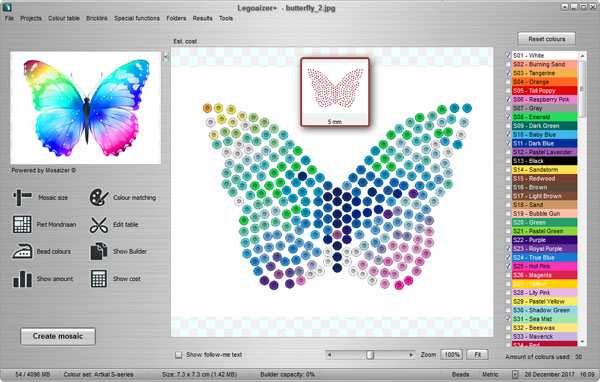
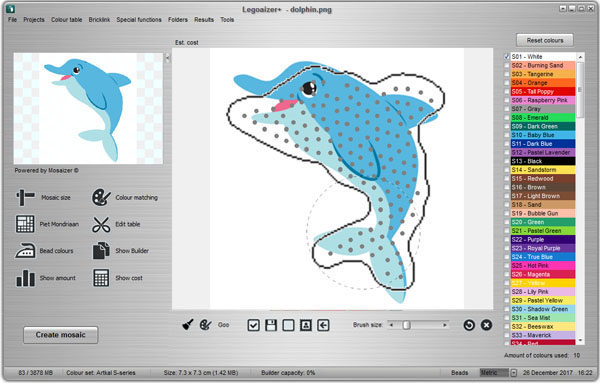
Here is an example that works pretty well, with a downloaded image from the internet: as you can see the butterfly matches pretty well with the shaped pegboard.
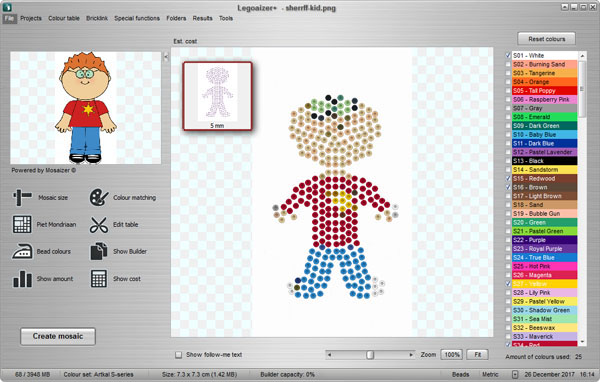
The next example demonstrates that in many cases the match is not that good. In this case the eyes of the boy are in his hair, no feet, and incomplete hands.
We will demonstrate the use of the built-in so-called 'goo' functionality. This feature can interactively and intuitively push parts of the source image to the areas you'd like it to be present. This approach is called 'goo-ing', like you are kneading clay or silly-putty into the shape. And you only have to use the mouse.
To start the goo functionality, open the 'Bead colours' panel, and press the 'Goo' icon (the right button on the left in the interface) in the now visible work area. The 'Bead colours' panel will now be closed, and you will now see the interface of the goo feature. In the left part of the image below you see this new goo panel, the source image, and a transparent image of the shaped pegboard, with all the pegs in place. You can now clearly see why the image won't fit, and where you should 'goo' the colours a bit. The goo action is very easy: select your 'Brush size' (indicated as the dotted circle), click on the image where you want to push the colours to another location, and while keeping the left-mouse button pressed, move the mouse to push the part of the image towards the location you want it to be. It might require a bit of practice, but soon you'll get the hang of it. Use short movements, and frequently 'goo' your image. That works better than one long swoop. The action does not have an 'undo', so be careful not to push the wrong area. In case you want to start again, press the 'Reset' icon, the image button on the full right. In the below image you can see such a goo effect in place.
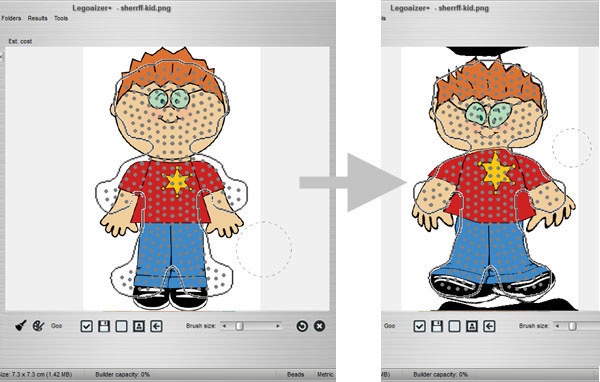
In the left picture above you can see a couple of controls. From left to right:
The size of the brush should approximately be twice the area you'd like to push. In most cases, a large brush works better than a small brush. We have corrected the source image, by pushing the green glasses downward, making sure the hair is still covering the pegs on top, moved the hands sideways, and pushed the shoes to the side and slightly upward. After a few smaller corrections to assure that every peg has the right colour, we finally press the 'Return' button. This will effectively replace the goo-ed image as the source image, and finally we create the new pegboard mosaic. The result is quite nice:
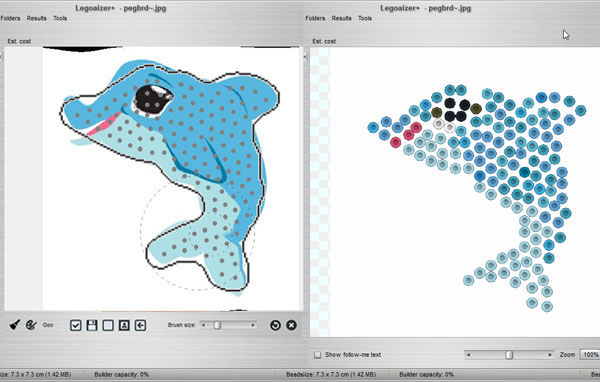
Below, we have one more example to show that this is a really nice way to correct the image to make it fit with the pegboard. We have two images. The top image shows that the dolphin has almost the right shape, but not every peg is covered with the correct colour, and many peg are still white. The bottom image shows the goo-ed corrections that we made, and the final dolphin. Tip: before you recreate the mosaic, be sure to first reset the amount of colours...when you don't it might not use the new colours.
Lesson 2: Drawing your
own pegboard shape
A last option to use the shaped pegboard, is by drawing your
own colours for the pegboard. The free format is quite useful to make a great
design, and then build it. Of course you can just select any colour bead and
put it on your pegboard, but in some cases a predesigned shape would
be preferred. This is how you create
one.
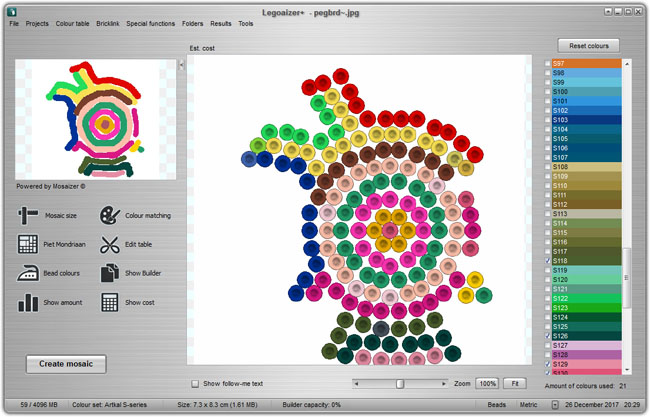
Press the 'Bead colours' to open the beads panel with the, by now, familiar controls groups. Select your pegboard shape, and press the 'Goo' button. In contrast to lesson 7, you will now select the 'Draw' option (left bottom of the control panel for goo-ing). This will delete your source image from the background, leaving only the outline and peg locations of your shaped pegboard. You will probably see something like this (the inset is the pegboard shape we selected for this exercise):
![]()
From here you are in free format drawing. Simply use your mouse to draw lines on the 'canvas' of the pegboard shape. We have selected a brush size which is slightly larger then a peg, basically covering it completely. The free format exercise is a nice one if you are using a pen-tablet, like the Wacom Bamboo or Intuos, to draw lines with a real pen. Otherwise drawing with a mouse might be tricky to make curved lines, but a bit of practice might be useful. You select the colour by selecting (= clicking with your mouse on) a colour patch from the colour list on the right! This way only available beads colours can be selected. Also here there is no 'undo' but it you select a white colour, the line might as well disappear. Every colour you select is also shown below the controls, for easy reuse. This is our result:
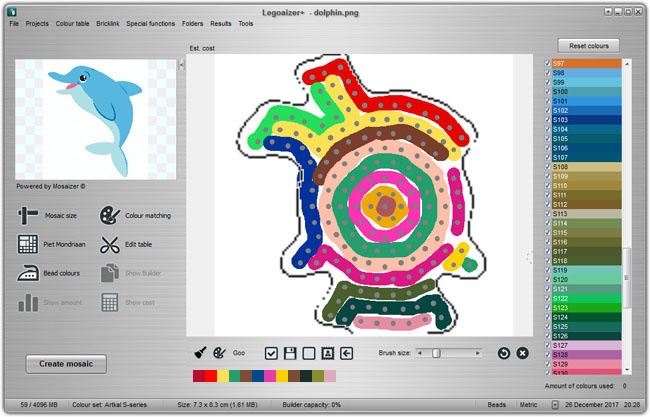
All the colours are available, even if the checkbox on the left of the colour is unchecked. When you want to be sure all colours are actually selected, you still need to first press the 'Reset colours' button. If you forget, and your drawn colour is unselected, this colour will also be skipped in the end result. When we are done, we again press the 'Return' button, so the source image is now effectively replaced by this drawing. Finally, by pressing the 'Create mosaic' button, a perfectly coloured result is seen:
Some beads are still in a slightly different colour. This is because some white is still seeping through, and by resizing the colours shift slightly. To avoid, it's encouraged to make sure the pegs in your drawing are really 100% covered with the colour, and with no 'bleed' from another colour. Otherwise ignore this colour in the design, and take your original colour from the box of beads.
Here is a summary of the colours, same pegboard shape, different drawing, but including the image of the 'Special printing' .pdf file: