 Calligram Creator -
Help Calligram Creator -
Help |
 Calligram Creator -
Help
Canon EOS
Calligram
Creator has the
possibility to trigger the tethered camera shutter from its own interface. Currently a
number of Canon EOS cameras are supported (see chapter 3). The Canon EOS
camera must be connected via an USB cable, and must be recognized by Windows.
Before you connect the EOS camera to the Windows system, you should first set
the image size, and the autofocus setting. The application can only trigger
the shutter and has no controls
available for more actions, like zoom and focus. Please do not set the image
quality to high, or save in RAW format. Best setting for image size is S3
(depending on your camera type: the lowest image size setting). We typically use
720 x 480 pixels. The application does not need a high resolution image to
create Calligrams and Legograms. For Emojigrams a higher
resolution might be useful because it has an option to print the emojis on
the original image. A setting of 1800 pixels on the long axis
should suffice for
sure. Unsupported feature? The Canon EOS feature is tested
with a 2014 EOS camera. Since Canon regularly updates its API, there is no
guarantee that cameras from 2015 and newer will also work with the currently
installed API. Although successfully tested with a few cameras (one of them
being the Canon 1100D, aka Rebel T3), it's quite difficult to test all cameras....
In case it won't work, please let us know, we might be able to send you
a different API from Canon, that could successfully work for your EOS camera. Precursor
- Warnings
Five important notices:
1. Connecting to the Canon EOS camera The Canon
EOS camera is connected via an USB cable. When you
have installed Canon's own proprietary application (Canon EOS Utility), to control the camera via
the windows system, will be started. When you close this utility,
(depending on your Windows version) a new window will be opened by Windows
itself, showing
the camera's memory card content. The latter is a normal WIA protocol, and cannot be skipped, or exited (the pop-up window will simply
reappear). In Windows 7 this is
typically popping up, in Windows 10 this is typically not the case, and
the Windows Explorer is only showing the memory of the camera as an external
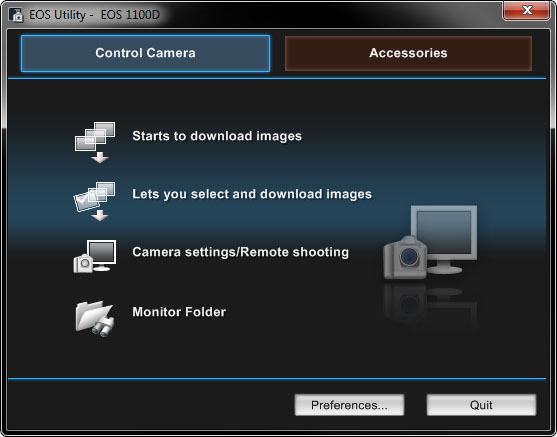
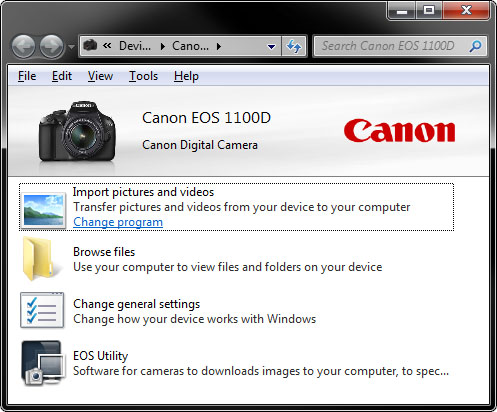
disk. The following screens could be seen in Win 7 when the proprietary Canon
EOS utility is installed: Above: the starting screen
for the EOS Utility. Above: the EOS Utility
GUI. Above: the Windows pop-up
when the utility is exited, or no utility was installed. You can now keep the last
Window active, or minimize it, you don't need it for the application. When these
screens are shown, your camera is connected successfully. In some cases it's better not to
install the EOS utility if you do not wish to use it in
any way. In that case the Windows pop-up window will start immediately. 2.
Activating the Canon EOS camera control
Start the application, and start
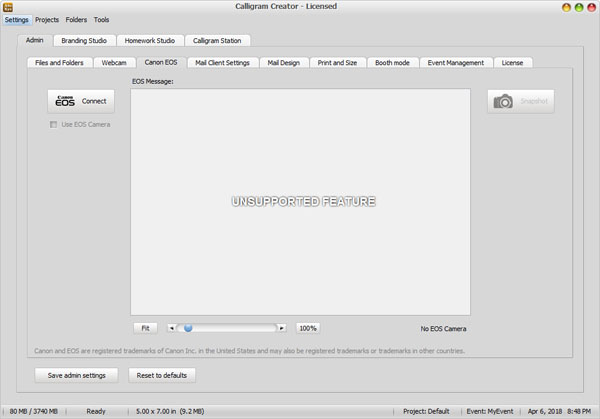
a session. Now open the Canon EOS tab in the admin section. The following
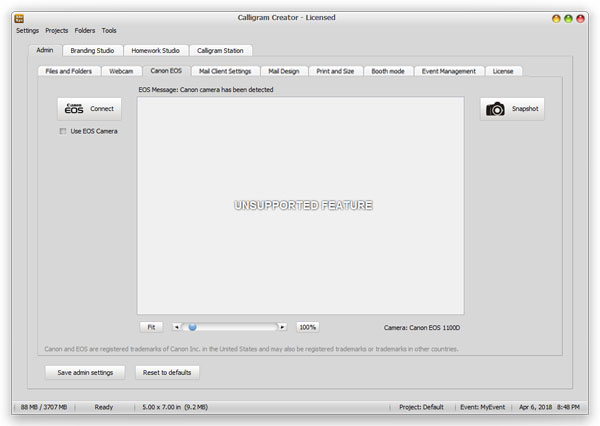
controls are now visible: On the
left you see the 'Canon EOS Connect' button, on the
right the 'Shapshot' button. The Snapshot button is
inactive because there is no camera connected yet. press the 'Connect' button, and wait for the response (can take a
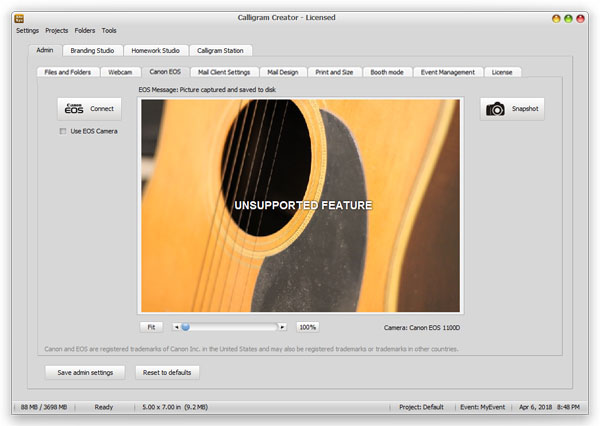
second). You will now see a message in the top of the interface, and the camera
type at the bottom (the EOS 1100D, =
Rebel
T3 for USA market): The Snapshot button has now
also become active. Press the 'Snapshot' button, and
wait for the camera to respond (can take a second, depending on the autofocus
settings). The image is taken and you will now see the image: The
little slider below the image and the 'Fit' button
can now be used to pan and zoom the image. The 'Fit'
button will downsize the
image to full view. Since the
'Snapshot' button is the same as the 'Snapshot' button in the 'Calligram
Station' interface, the image is also copied to the 'Snapshot queue' in the 'Calligram
Station' part. To also activate the 'Snapshot' button in the 'Calligram
Station', you now need to check the little box
on the left: 'Use EOS Camera'.
Basically this is all there is
to do. The camera now works
like any other connected (web)cam. Better not activate the webcam at the
same time (for laptops: deactivate automatic webcam activity), because the application will only trigger
the first camera that it found in the Windows system. It's not predictable which
camera this will be. EOS 1000D More
cameras may be supported, but only the 1100D camera was tested. The list above
was provided by Canon, where the SDK of Canon was used that supported these
cameras. It is expected that the Canon SDK files indeed include support for
these EOS cameras. If A later camera than 2015 is required, please let us now
(sybren@apphelmond.com), we might be able to provide the correct dll
from the Canon SDK.
EOS 100D
EOS
1100D
EOS 1200D
EOS 40D
EOS 450D
EOS 500D
EOS 50D
EOS
550D
EOS 5D Mark II
EOS 600D
EOS 60D
EOS 60Da
EOS 650D
EOS
6D
EOS 700D
EOS 70D
EOS 7D
EOS 7D Mark II
EOS M
EOS-1D
C
EOS-1D Mark III
EOS-1D Mark IV
EOS-1D X
EOS-1Ds Mark
III