Calligram Creator -
Help Calligram Creator -
Help |
Calligram Creator -
Help
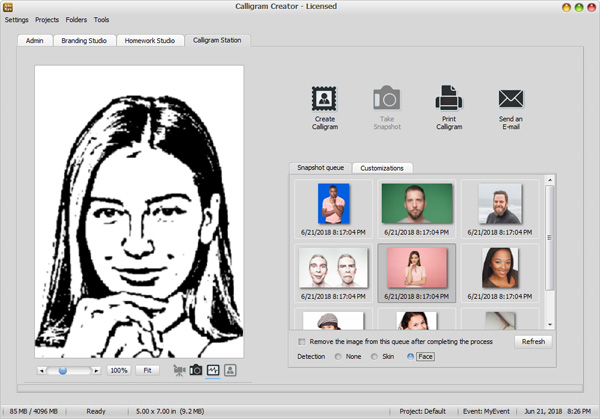
Calligram Station
The Calligram Station is the workflow area during
events. Ideally the techie should not have to change between tabs during an
event. The actual controls that appear is this area will depend on the type of
output: Calligram, Legogram or Emojigram. The Legogram image only has one setting: portrait or landscape. The Emojigram
has different control than the Calligram, but are basically the same as can
be found in the Homework Studio tab. here, we show the Calligram interface, since
this has a couple of additional tweaking parameters that are not offered in the Homework
Studio. In this tab also the type of
output can be selected (otherwise done at start): The
Calligram work area
In some cases, the Calligram black parts are not really reflecting a good
snapshot, but when the two controls are set visible on this tab, the techie should be
good. The work
area has four
buttons: These 4
buttons are used for a
normal (first) Calligram creation sequence, but have exactly the same functions when a
reprint is requested from the 'Print and reprint'
tab.
On the
left, below
the Calligram black and white source you see a zoom bar, and two quick
zoom buttons. On their right two small buttons are added in this tab. These
are only visible when the webcam is active. With these two buttons you can toggle
between the webcam live stream, and the Calligram picture (still picture).
Also, a second set of orientation radio buttons is available (landscape
or portrait), which are synced between those in the 'Print
and size' tab of the 'Admin'
page (and vice
versa). Below
these four buttons two tabs are placed. The first tab
has a few event controls (as shown in the screenshot above): Snapshot queue The second tab contains a Hot
Folder explorer. In case you want to create all snapshots at the time, and
the process them later on, you can't use the 'Print and reprint' option. Instead, double-click on a
picture in the overview. This will reload the snapshot, and you can now create a
Calligram/Legogram, print, send e-mail, etc. When finished you are asked if the
snapshot must be removed form this overview. If not, the picture remains
visible. If yes, then the snapshot will be removed, but it has been saved on the
backup folder anyway. In that case it can now be used from the 'Print and reprint' tab. This confirmation question can be turned off
by unchecking the box in the tab 'Event
Management', group 'General preferences',
'Ask for confirmation when
reprinted'. The default option is to keep
the image in the snapshot folder. You can force the snapshot to be deleted
after postprocessing by checking the tickbox 'Remove the image
after (post-)processing the Snapshot queue'. Alternatively, since this overview behaves as a Windows Explorer,
you can also right-click on any image, and select an action from the pop-up
menu. So: deleting an image will actually delete the
image from the Hot folder directory! For extra convenience, the snapshot queue also
has the controls embedded for skin and face detection. The
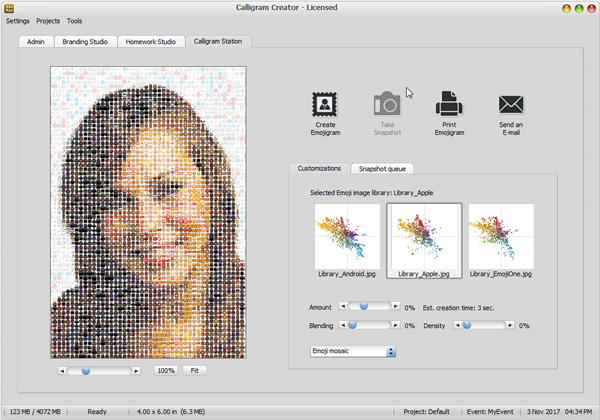
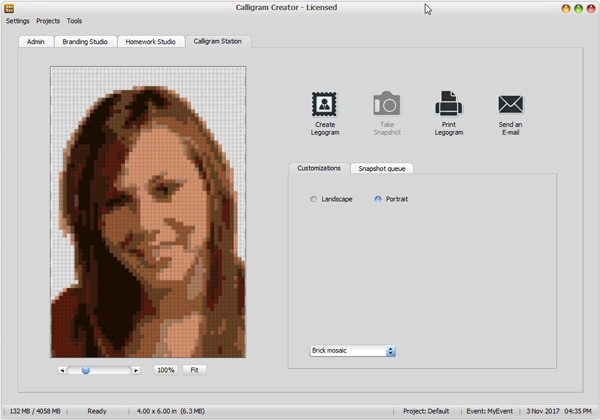
other two techie interfaces
For completeness we will also show the
two interfaces with the Emojigram and the Legogram: The coloured patterns on top
are the same ones as can be found in the Homework tab: every point represents an
image of the library in the (Y)UV colour space. The Legogram interface only
has a simple selector of the paper orientation. The effect is
immediate. 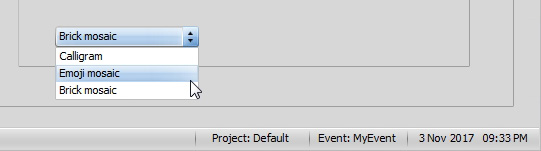
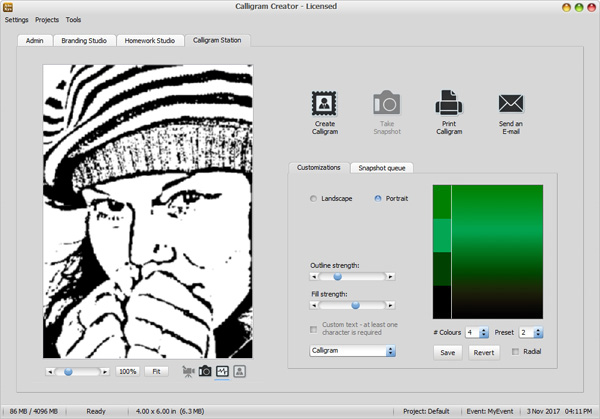
'Create Calligram' = press this button to start the
Calligram creation sequence. It may take 4-10 seconds to finish, depending on
the speed of your system (i5 will take 4-7 seconds, i3 can easily take 12
seconds).
'Take snapshot'
= press this button to take a snapshot from the attached webcam
(or video cam). It does not trigger a tethered digital photo camera,
because there is no interface between Calligram Creator and the application
that manages a tethered camera (e.g. the Canon Rebel needs its own
proprietary interface).
'Print Calligram' = this
will send the currently showing Calligram to the printer. Make sure your
printer has been preconfigured to match with the Calligram output
size.
'Send and e-mail' =
manually start the mail client. It will ask for a mail address, and the
currently visible Calligram will be sent by e-mail. When the
option 'Ask for e-mail
address after Calligram completion' is checked, you get a pop-up
window after Calligram creation asking for the e-mail
address.
Tweak the outline and the
fill strengths. This is usually not required, but in some rare cases you might
want to tweak the snapshot.
Use a custom text instead
of the pre-loaded file text. First check the box on the left, then type the
text you want. Only two lines of text are visible, but the text may be
bigger. Multiple words is
possible, the minimum length must at least be one character. Even in case just
the 'A' is provided, the entire Calligram will be built up with
A's.
Select if you like to
create a Calligram or a Legogram
The colour pattern of the
Calligram:
On the left you see (in
this example) four colour patches. These are the 4 colour codes in the
colour code text file. When the application creates the colour profile from
e.g. these 4 colours it will interpolate between each of the 4 colours, via
the HSL colour system.
When you change the
number of colours it will now create a next (random) colour at the bottom of
these patches. When decreasing it will again delete the last colour
patch (from the bottom). The colour profile is immediately updated.
To return to the text file patches, press
the 'Revert' button. In case of a picture file, the
'Save' button is disabled (see also next
bullet).
To save the
current colour codes, press the
'Save' button. In case the original colour
profile was a file with colour codes, it will replace the currently indicated colour code text
file. In case the colour profile was generated on the spot and the
original file was a picture file, the new on-the-fly colour profile is saved
in a new file (a new filename request is prompted).
The 'Preset' identifier has 18 different presets.
The checkbox 'Radial' will
create
a circular colour profile, but only when custom colours are used (so: not valid for a picture file).
You can also change each
individual colour patch, by clicking on it (the hand cursor indicates a
clickable area). Make sure you first select the number of colours: when you
now change the number of colours the colour patches can also change colour
because it selects a random colour when more colours are chosen,
but also discards previous colours when fewer colours are
chosen.